

Hi!
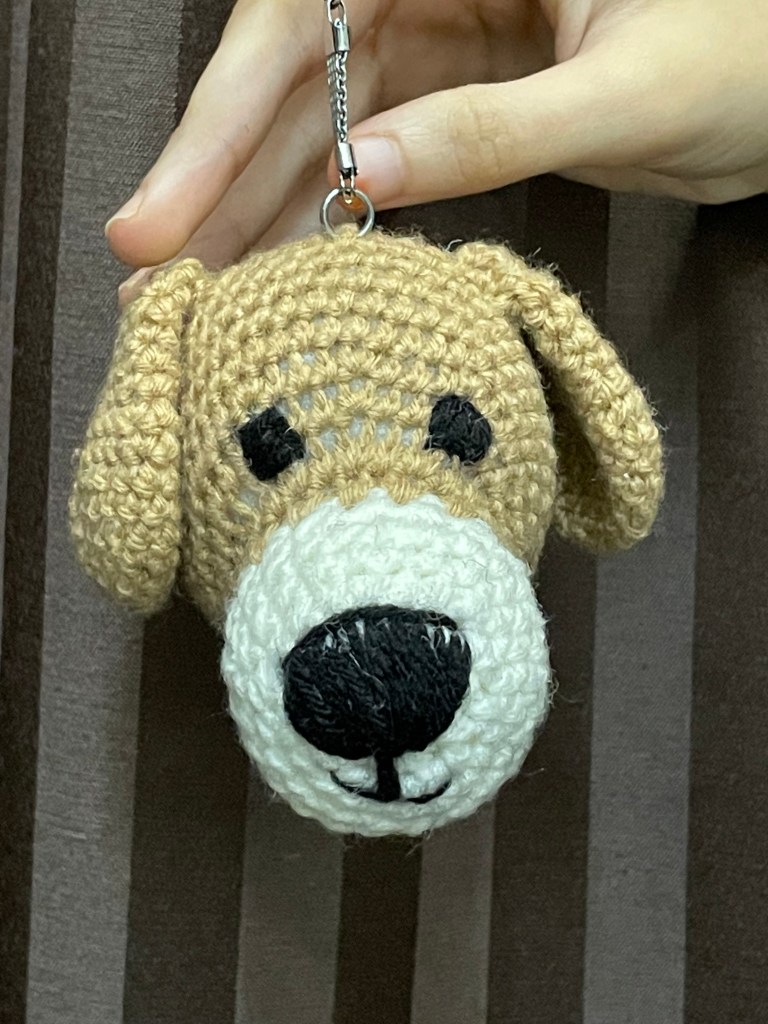
Here’s another post after a long time… This is a keychain I made as a gift for a friend of mine with help from a YouTube tutorial. Materials required are brown coloured and white coloured yarn, tapestry needle, stitch markers , a pair of scissors , stuffing as well as a keychain ring.
It’s a fun and easy project to make for beginners as well as advanced crocheters and doesn’t also take up a lot of time either.
– tanvi
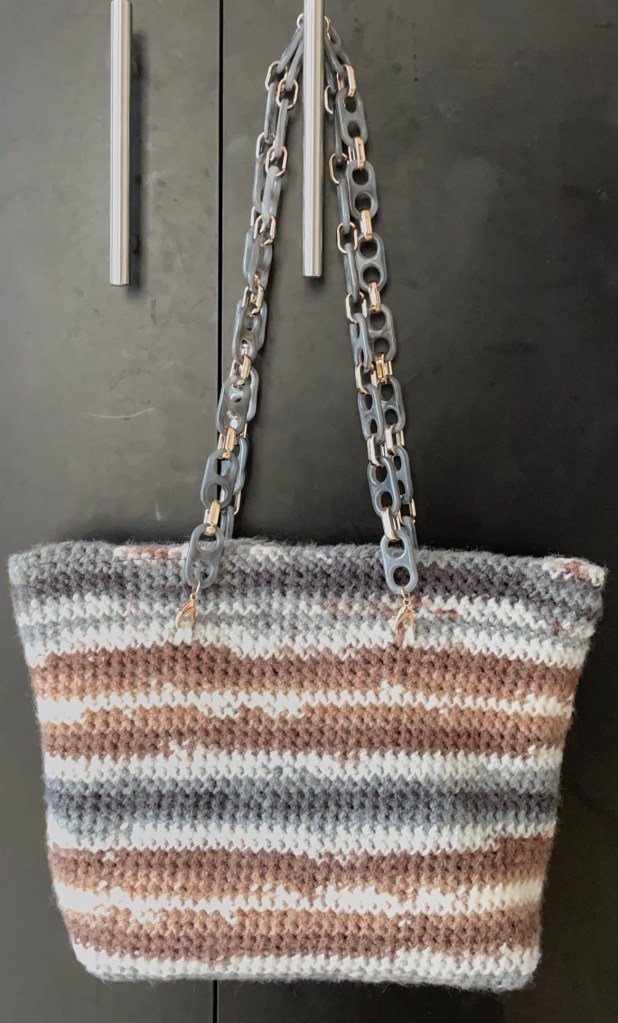
Hi everyone! It has been a long time since I posted anything and now I am back with this stylish purse that I crocheted using a 4mm hook, Alize Burcum Batik Acrylic Yarn in shade 5742, tapestry needle, stitch markers, a pair of purse handles with hooks and inner black lining along with a purse zipper. I referred to the pattern given by B. Hooked Crochet, the link for which I have attached below. One important tip to keep in mind : You might not find the correct handle or strap for your purse (I managed to find one after searching for it the entire afternoon), try ordering it online or get creative by crocheting the handles and simply attaching a hook to each end to secure it to the bag. While lining the purse you can also make a base for the purse which will make it look more trendy. Have fun crocheting!!!
– tanvi
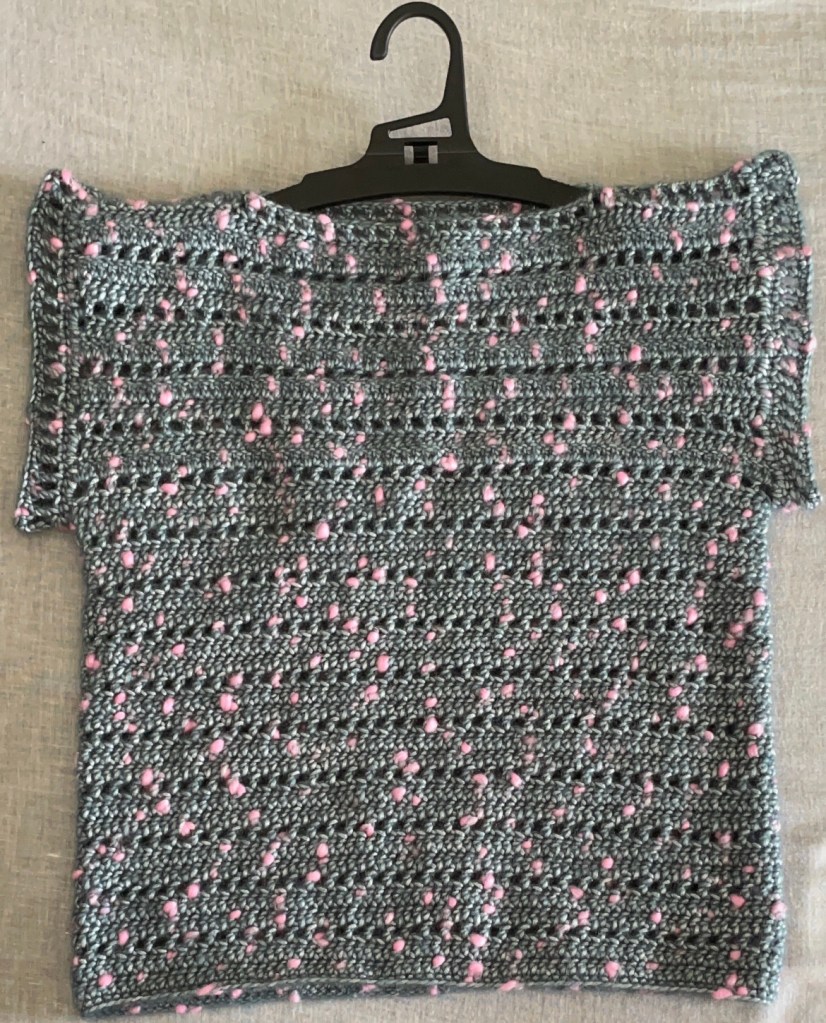
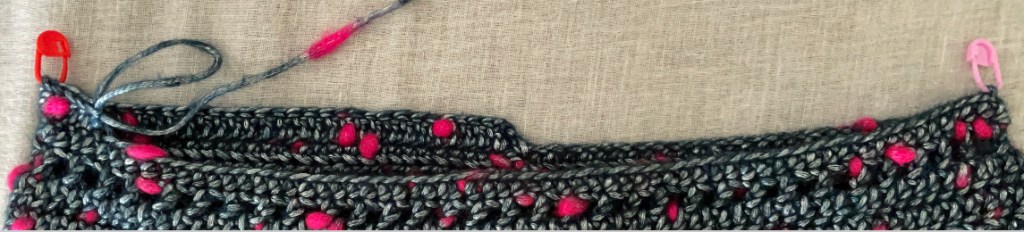
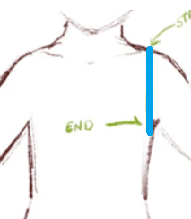
Hi everyone! This is a new crochet project that I have made and this time I have made it with writing my own pattern for the first time since I have started crocheting. I wanted to make a stylish boat-necked top that goes well on a pair of jeans so I searched online for few examples on Google but for once I didn’t find a pattern that I quite liked or wanted to make. So I combined my ideas into a pattern I wrote for this project;
I used Oswal Enjoy Knitting Yarn Multi Wool 200 gm Shade no-14, darning/tapestry needle , stitch markers, tape measure, a pair of scissors and a 4.5 mm crochet hook to make this project. The pattern is as follows:
The blouse is ready!
-Tanvi Jog
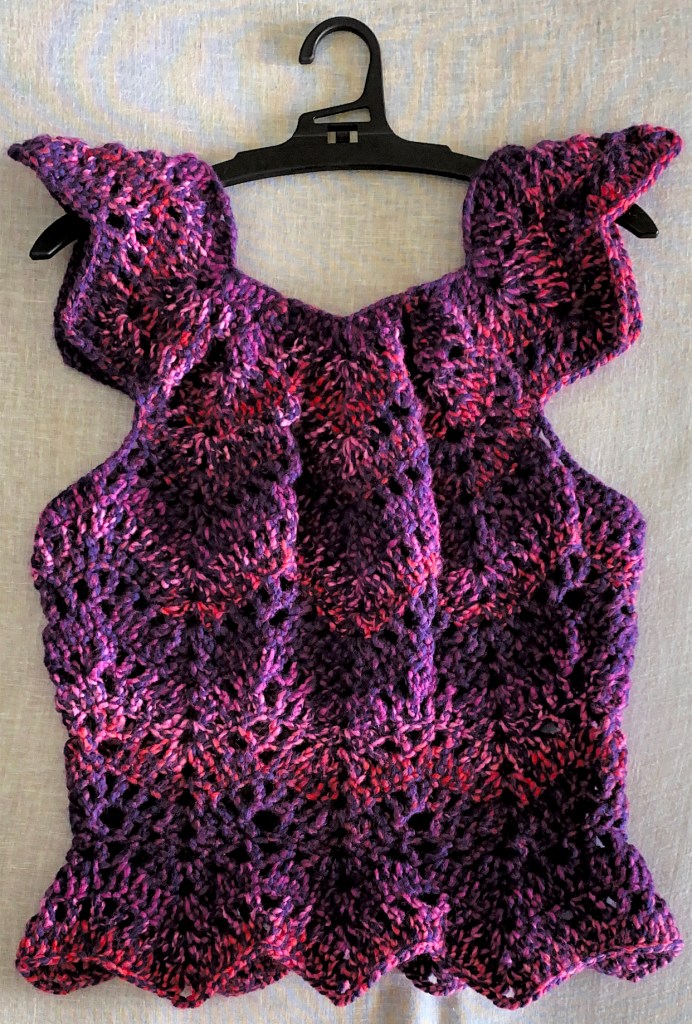
Hi everyone! This is one more crochet project I have made this summer. I made this with the help of Sirins Crochet on YouTube and altered a bit of the neck shape as per my liking. This is an amazing project for both beginners as well as experienced crochetiers and makes for a good clothing article for yourself or even as a gift to family and friends!!!
-Tanvi Jog
-Tanvi Jog

-Tanvi Jog
-Tanvi Jog
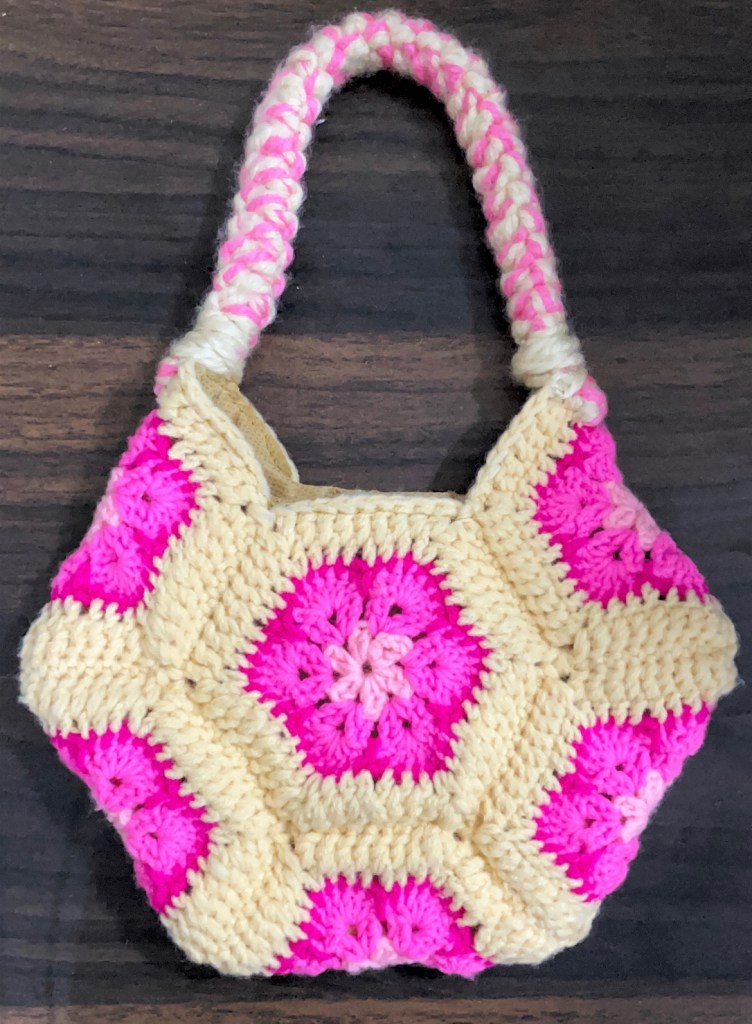
This is another bag from the collection of crochet bags that I have crocheted with help from YouTube channel ‘bella coco’ which is a very useful channel to learn all the basic required to crochet big projects. I crocheted this bag with the same steps as the bag earlier. This is a very good project for beginners as well as the experienced and is also a very good item to gift to friends and family!
– Tanvi Jog

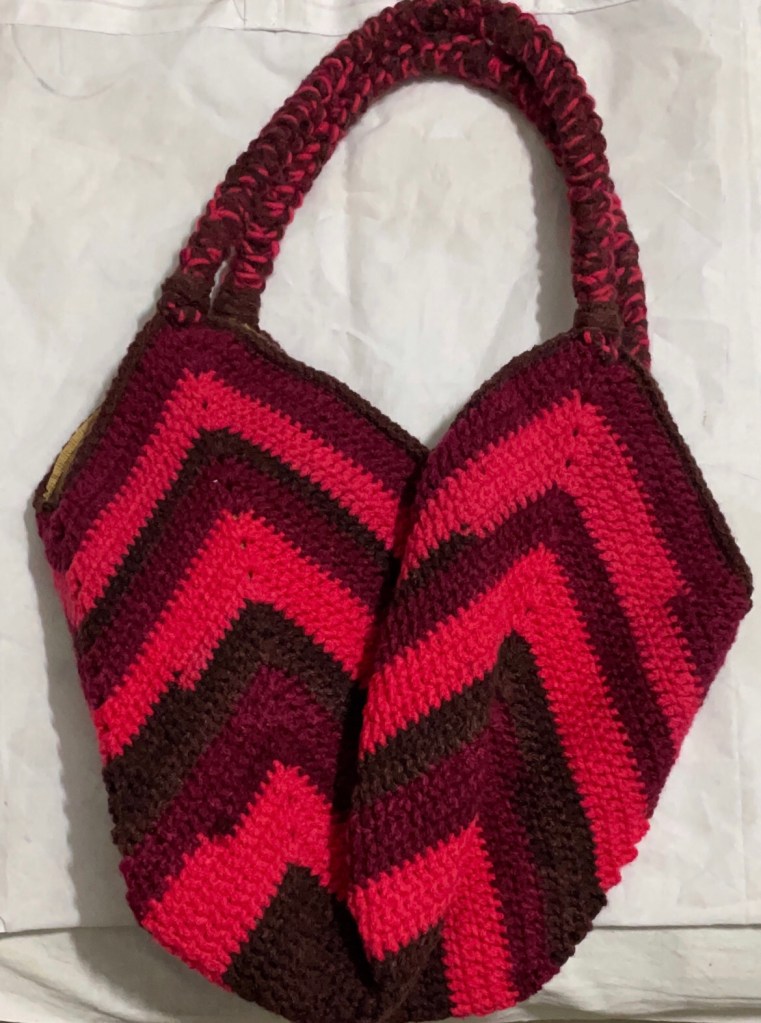
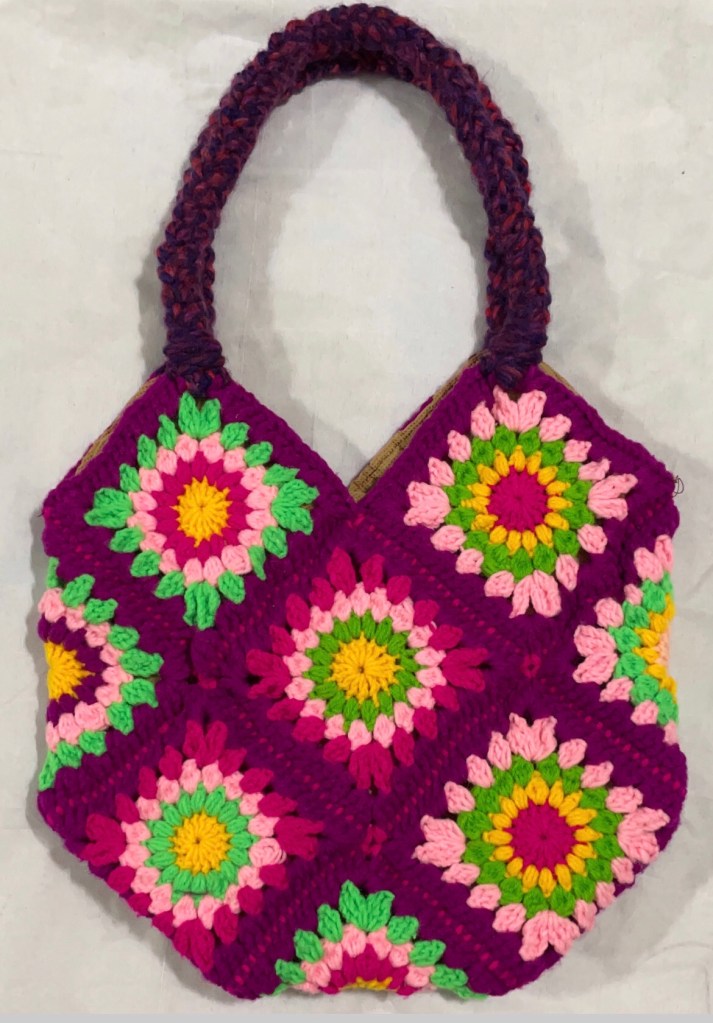
This is the first of the bags collection that I have crocheted with some help from YouTube channel ‘Sirin’s Crochet’ which is very helpful for beginners to make complicated projects.
I have made this bag by firstly crocheting 10 swirl pattern Granny Squares and then joining them in the way as shown in the pic. Then I attached the handles which I made by combining the same yarn colors I used for the granny squares and crocheted them into a sturdy cord and stitched them onto the tops both the sides of the bag using a tapestry needle. I also added lining to the bag from the inside. I have also attached below the videos I used for reference. It is a very good project to make for beginners and can be used for yourself or as a gift to friends or family!
– Tanvi Jog
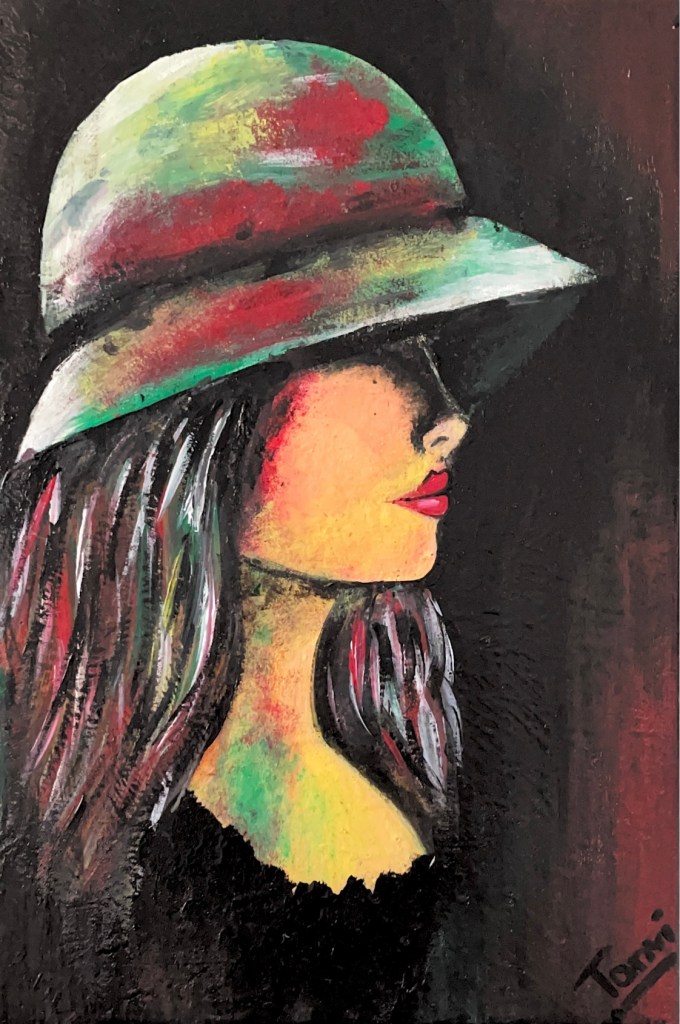
This is an acrylic painting I made by referring to Easy Painting Vered on YouTube though I have modified the background as per my choice. Easy Painting Vered is a really great YouTube channel for painting tutorials for beginners. This is a really nice painting that allows you to, kind of, play with the colors a bit and enjoy your painting!
-TANVI R. JOG
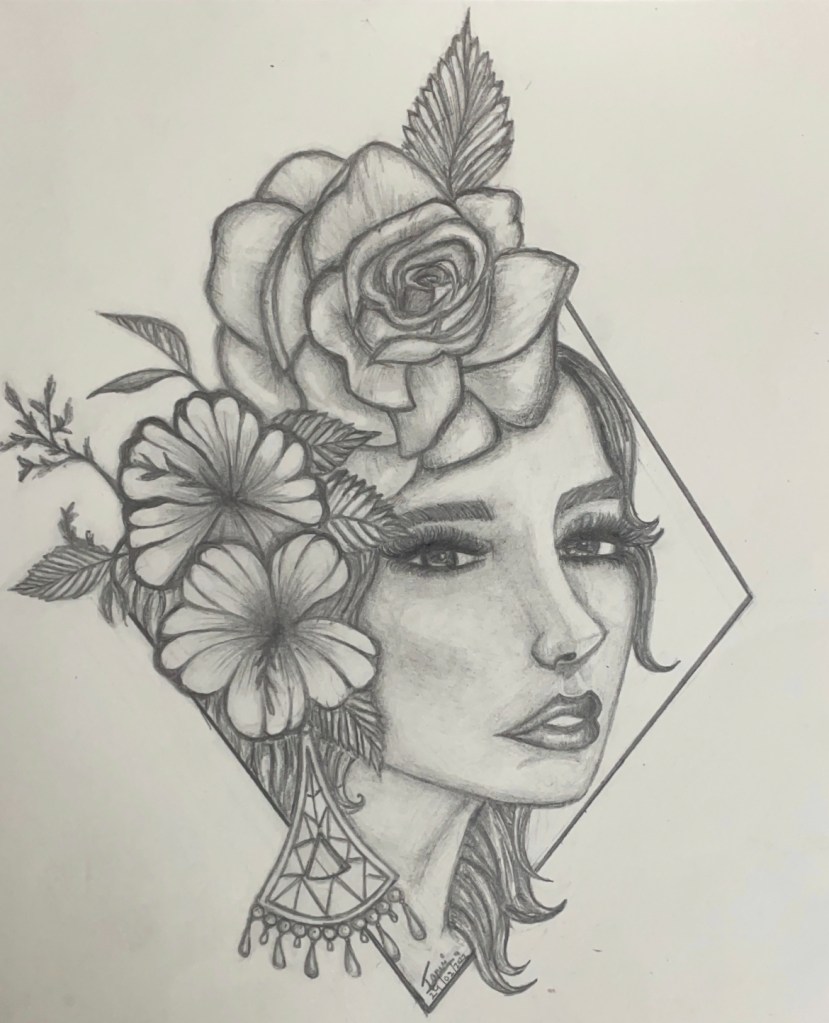
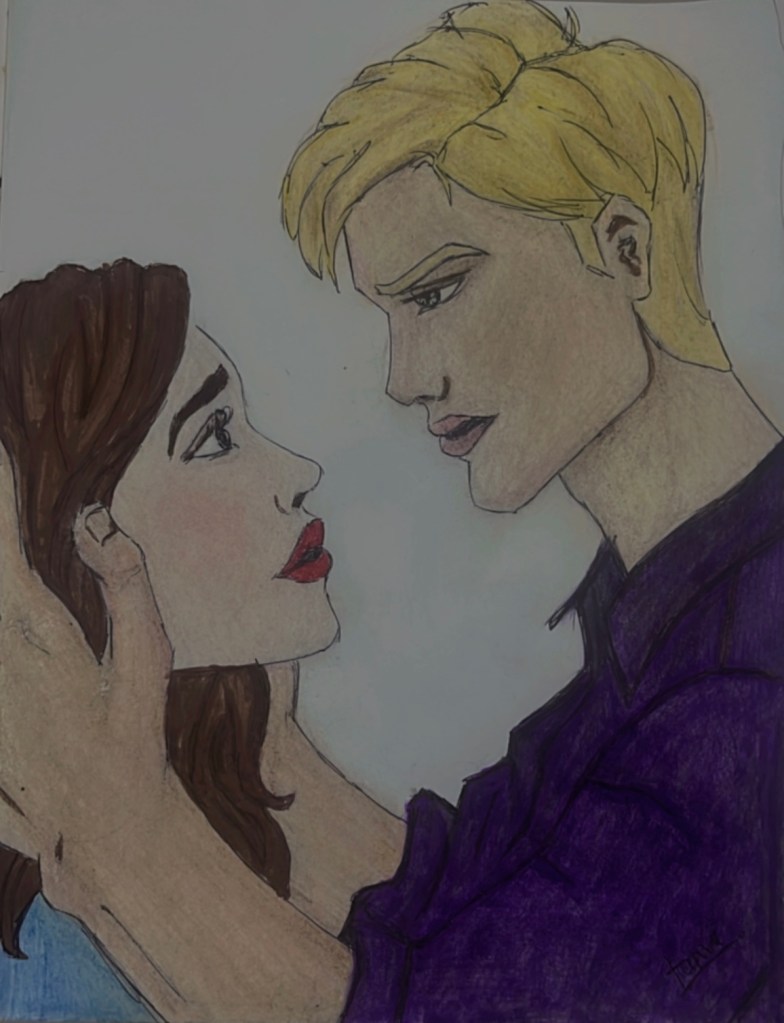
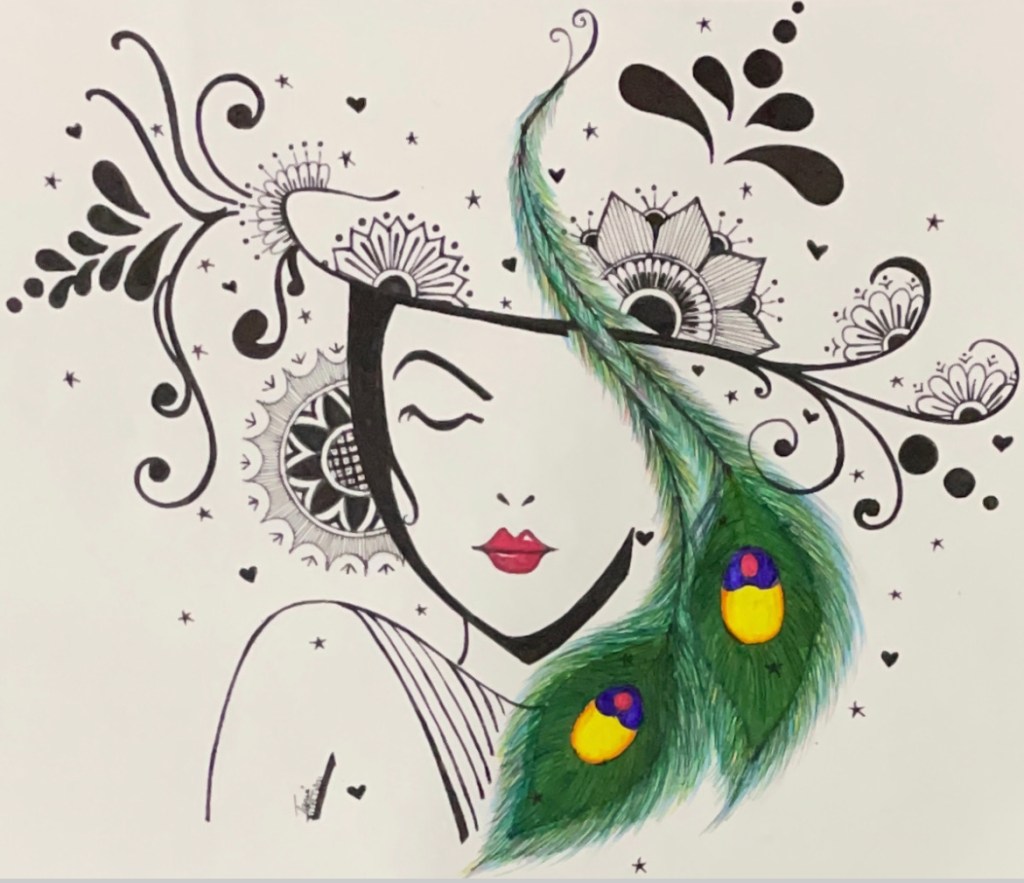
This is a pretty sketch that I have drawn with reference to a similar drawing on Google but I have modified the facial structure quite a bit, making her look like a beautiful but bored queen of sorts and that is enhanced by the flowers around her.
-TANVI R. JOG
This is a drawing that combines traditional mandala art with a little bit of modern approach. I was searching Google for new ideas for drawing when I came across this, but I modified it as per my style. It is quite an interesting and easy drawing that helps you relax as you do it !!!
-TANVI R. JOG
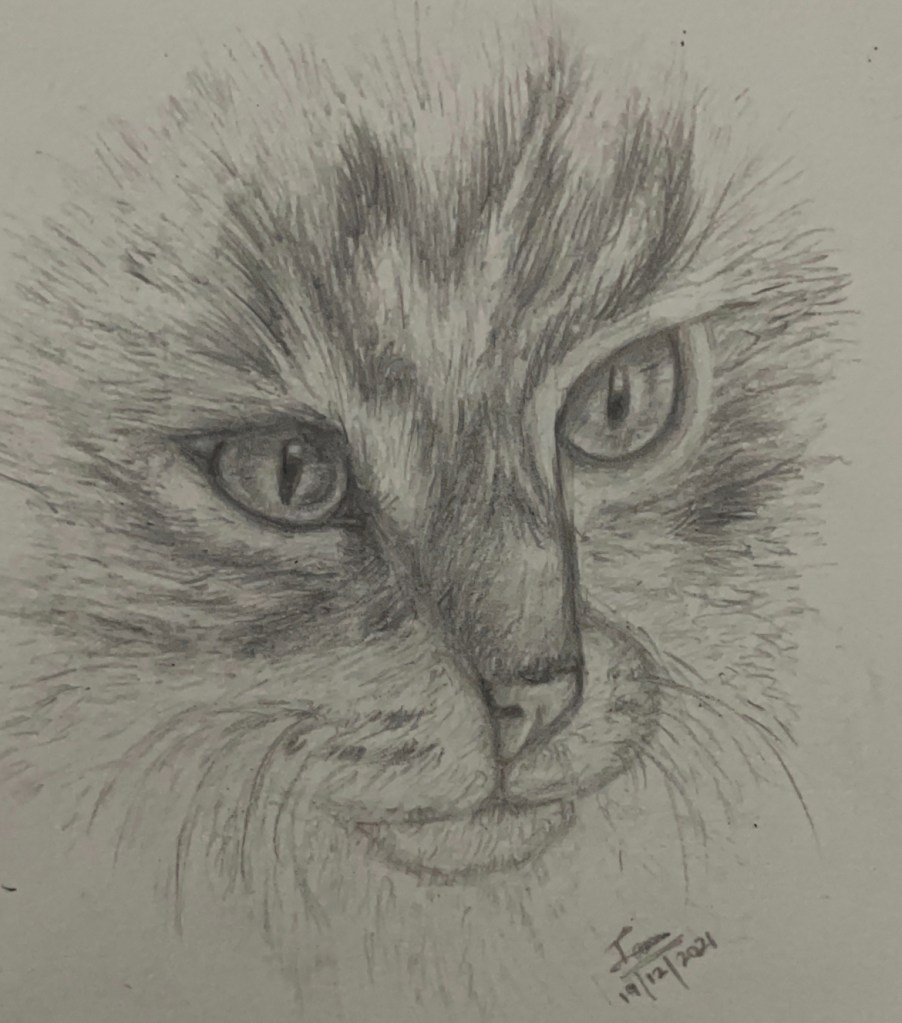
This is a cute pencil sketch of a cat that I drew by taking inspiration from my friend’s pet cat as well as Google. It is a quick sketch that is easy for beginners and can be made for practice as well!!!
-TANVI R. JOG
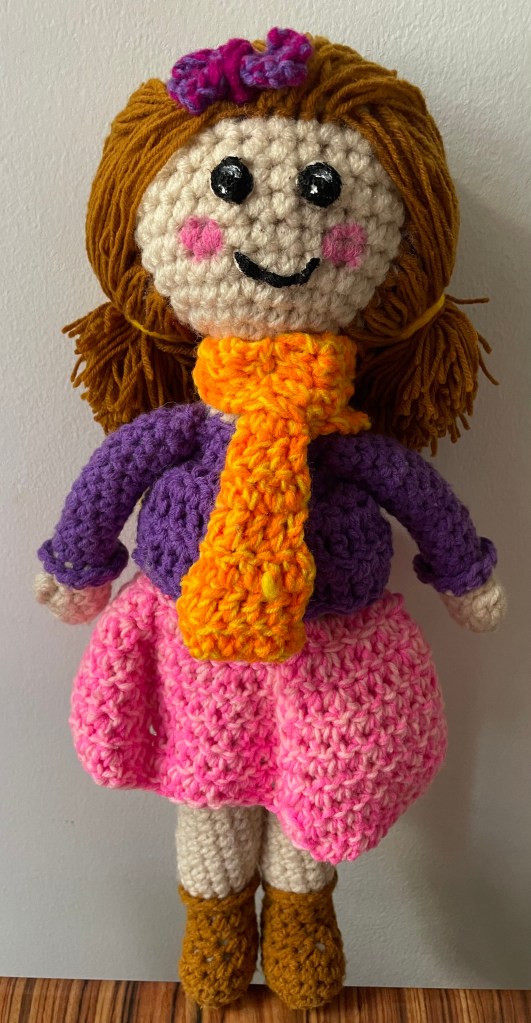
This is a doll I have crocheted for my little cousin sister. I got the pattern from a video on YouTube, but I modified it a little bit as per my requirement. It isn’t so much of a quick project but it is definitely easy if you know the basics. Overall, it is a fun gift you can make for your younger siblings or kids or anyone for that matter!!!
-TANVI R. JOG
For making this doll, I request you to watch the videos below;
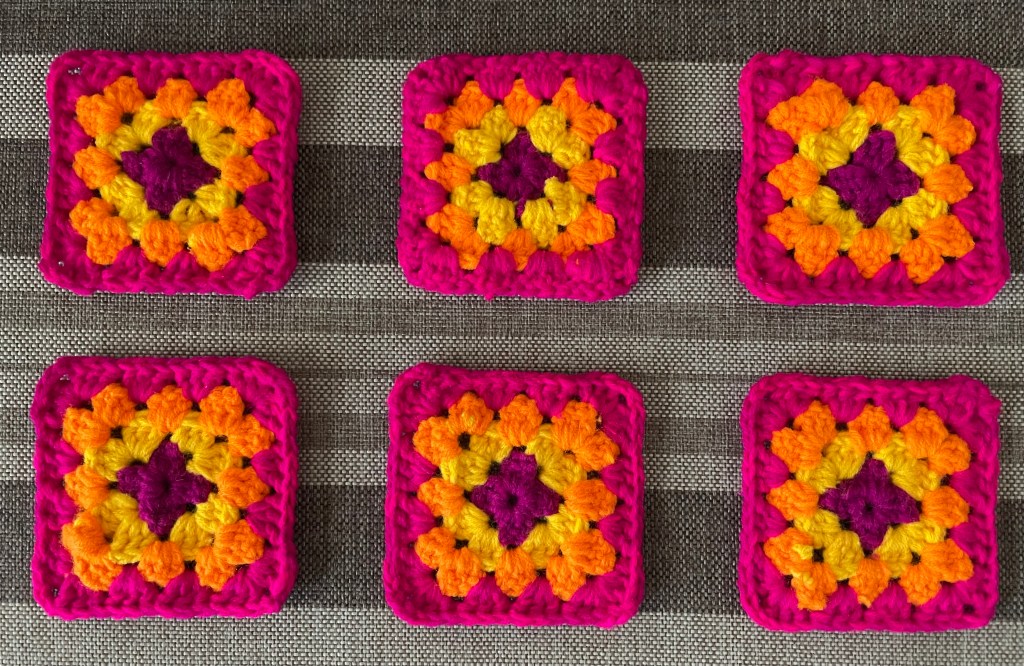
These are a set of 6 tea coasters that I have crocheted as a gift. The only skills you need to know to make these are how-to-crochet-the-granny-square and how-to-crochet-treble stich (UK terms)/ double crochet (US terms). I learnt most the basic crochet techniques from a YouTube channel- Bella Coco. These tea-coasters make a quick, useful, easy and beautiful gift for anyone especially women over 20 years old.
-TANVI R. JOG
For further guidance on how to UK treble crochet/US double crochet :
For further guidance on how to crochet the Granny Square :
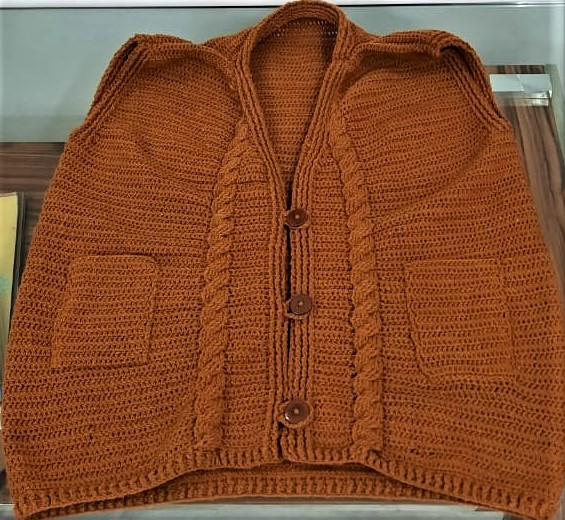
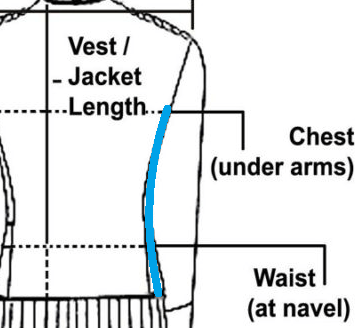
This is a sweater-vest I have crocheted out of BlueStar Oswal Acrylic Cashmilon Yarn (I used brown colour since I was making it for my Grandma). I am a total beginner and this is the first time I attempted to go for such a big project. I mostly made the whole sweater-vest with the help of a YouTube tutorial on a channel called Sirin’s Crochet (video attached below). I would also recommend beginner like me to visit the channel for more such projects. Lastly, this project took a lot of time, patience and yarn but it was worth it!!!
-TANVI R. JOG
Dark clouds forming in the sky,
Warn of a storm ahead,
In their cozy nests are the birds that fly,
For the harsh winds of the storm they dread,

The thunder, like a lion roars,
Raging winds bang on the doors,
And cracks and shatters the windows,
And all the leaves of the trees it winnows,
Fury is unleashed,
Expressing rage, sadness, and pain,
Hurt tried to be hidden,
And yet falls a single drop of rain,
That rolls down, down the cheek,
Thinking of the memories that have now turned to rust,
And away turn the stormy eyes of the face,
The face of the one with a now broken trust.
-TANVI R. JOG
This is a beautiful wall hanging made with simple materials ; craft paper, glue/ glue gun, newspaper and acrylic paint (preferably Pidilite).
This is a easy but beautiful looking craft that looks great as a wall hanging!!!
-TANVI R. JOG
For further help, check the videos below;
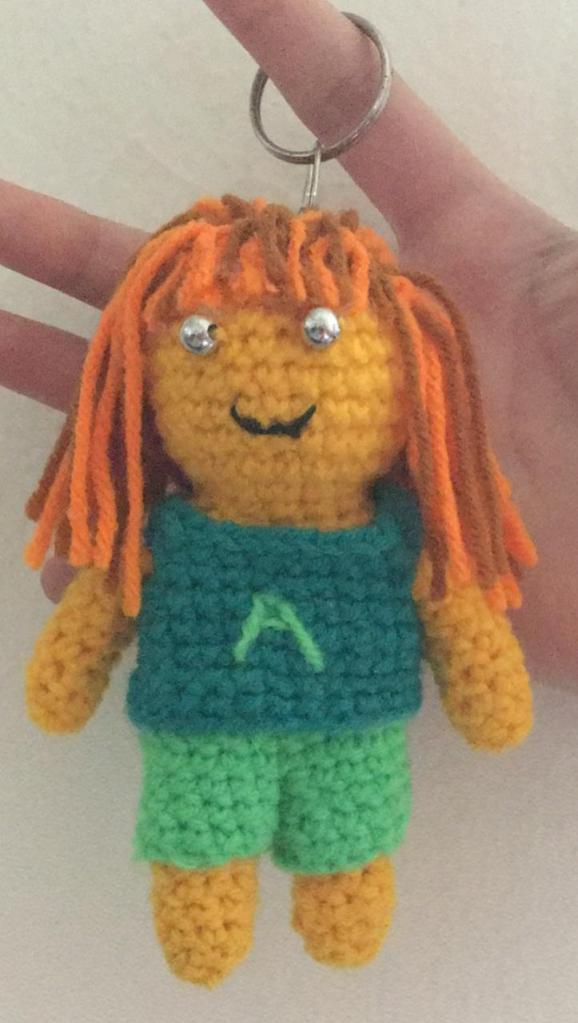
This is a cute little doll I have crocheted recently with help from YouTube. I made it as a gift for my best friend Aagna since it was her birthday yesterday.
First I made the doll using yellow colored wool, Then I crocheted the clothes, but I didn’t want to make a typical frock for it so I watched a few videos and then made a top and a pair of shorts. Lastly I attached the hair and the keychain ring.
Overall, it was a lengthy but fun project for me as a beginner!!! You can make this doll with the help of these videos ;
-TANVI R. JOG
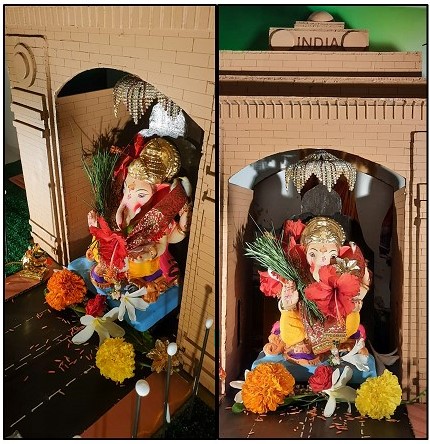
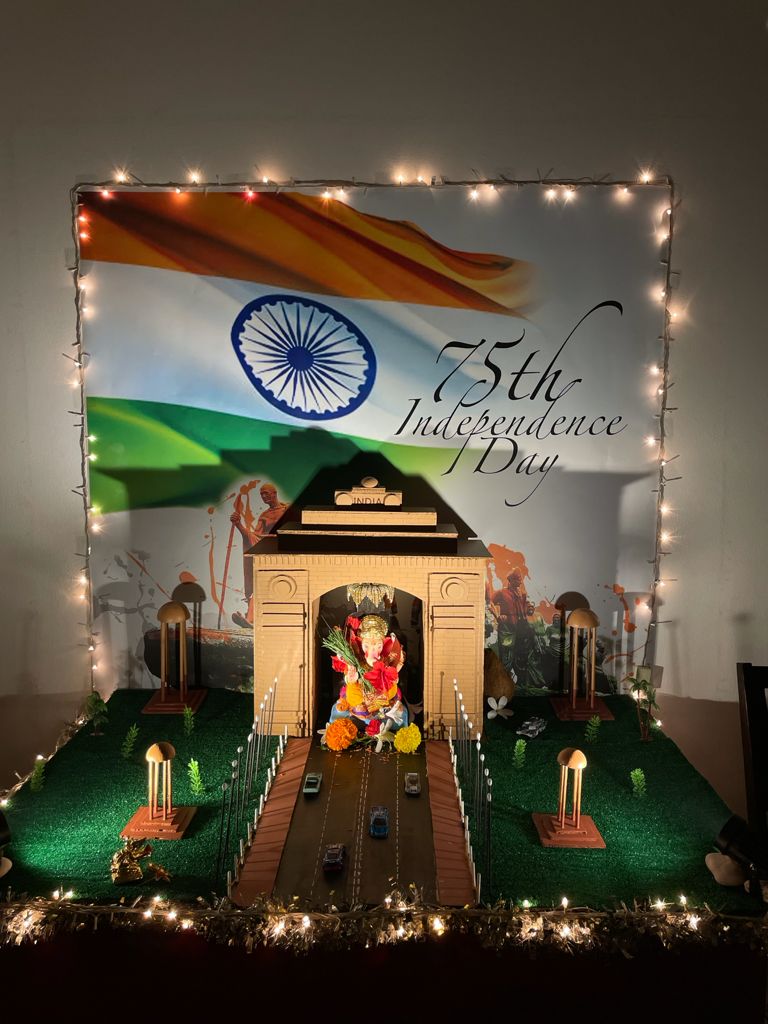
Firstly, wishing everyone a Happy Ganesh Chaturthi! As you might know, each year the arrival of Lord Ganesh (Ganapati Bappa) along with Goddess Parvati (Lord Ganesha’s mother) from the Kailash mountains is celebrated across India with pomp and splendour. As every year, this year too we have celebrated this joyous festival. My family and our family friends have made a beautiful decoration for Lord Ganesh!
Each year we would select a theme and make the decorations accordingly. This year our theme was of our country India’s 75th Independence Day. Our main idea was to make a replica of the India Gate. My Father, Vishal Kaka (our family friend; kaka translates to uncle) and Arjun Dada (Vishal uncle’s son; dada translates to older brother) made the structure using foam boards, Fevicol and nails wherever required. Once the structure was completed, I did the job of painting it and making the brick feel on the India Gate as well as painting the Ashoka pillar.
Then we set set the whole structure on a rectangular cardboard piece covered with plastic grass and did the lighting around it. We stuck a poster of the 75th Independence Day on wall as background. Finally we placed Lord Ganesha’s murty (idol) in the center of the arc. Our decoration was now complete!!!
-TANVI R. JOG
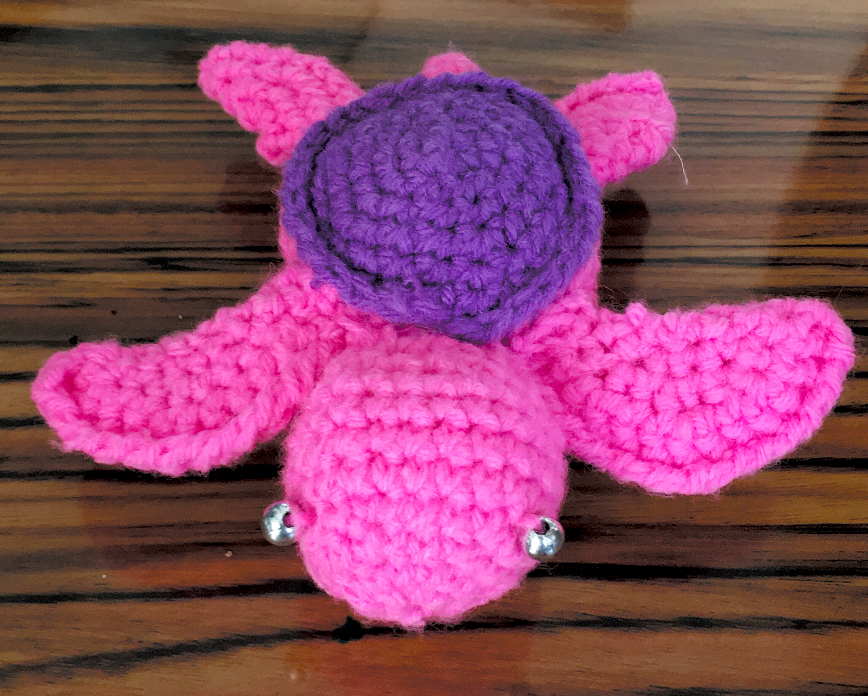
This is a crochet project I made with help from YouTube tutorials. It is a easy project for beginners as well, looks pretty and can be used as a keychain too!!!
For help making this project:
-TANVI R. JOG
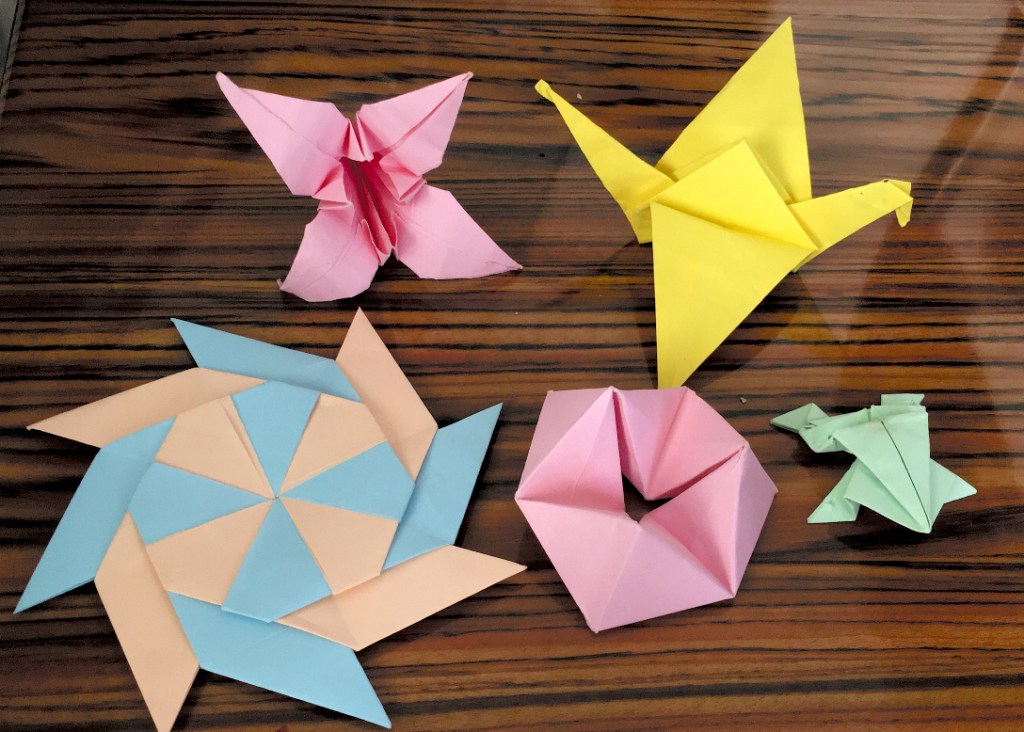
These are a few origami crafts I made during my summer break by watching YouTube tutorials. You don’t need many materials to make origami; just craft paper (sometimes pencil, glue and a ruler too). It is also quick and easy to make!!!
For further help with making these :
-Tanvi R. Jog

This is a cute little mobile purse I have crocheted with help from YouTube. It is quick and easy to make even for beginners like myself. I have added a hand hold strap at the backside of the purse. You can crochet one like this with the help the video tutorial below:

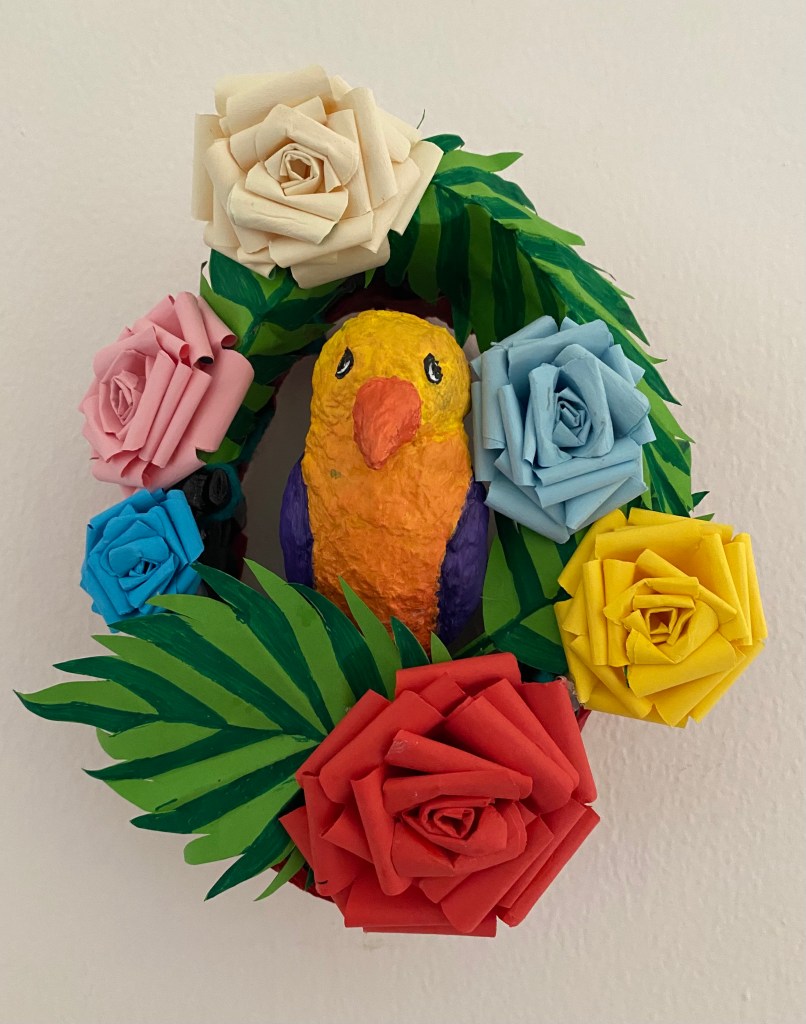
This is a beautiful DIY Wall Hanging made from materials-easily-available -at-home such as: old newspaper, a piece of cardboard/foamboard, acrylic paints, glue (Fevicol), craft paper (blue, red, pink, white, green, blue, yellow), a pair of scissors and a glue gun.
For many more wall hangings of this type, kindly check the posts earlier and be sure to follow the blog!!!
-TANVI R.J
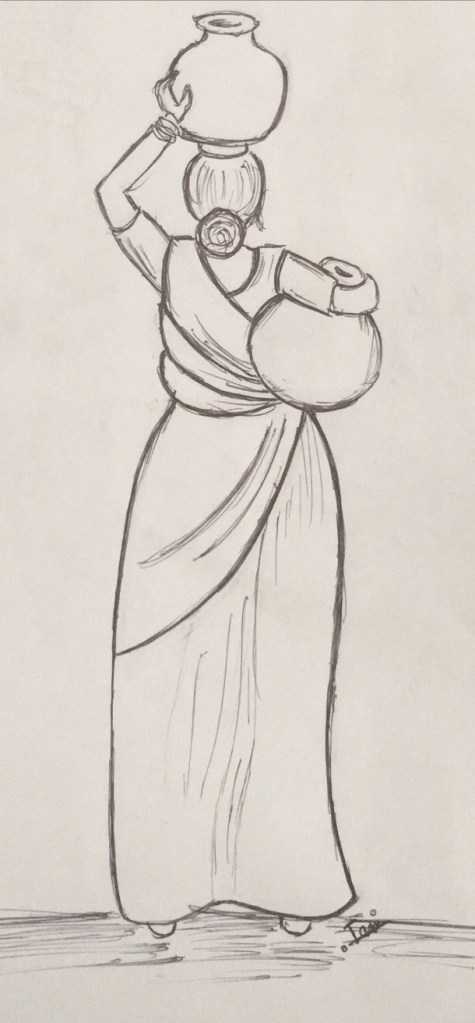
This is a sketch of a woman carrying pots most probably filled with water. I have taken the idea from the book : Grade Examinations- Drawing Made Easy. It is a quick and easy sketch that can be done for practice!
-TANVI R.J
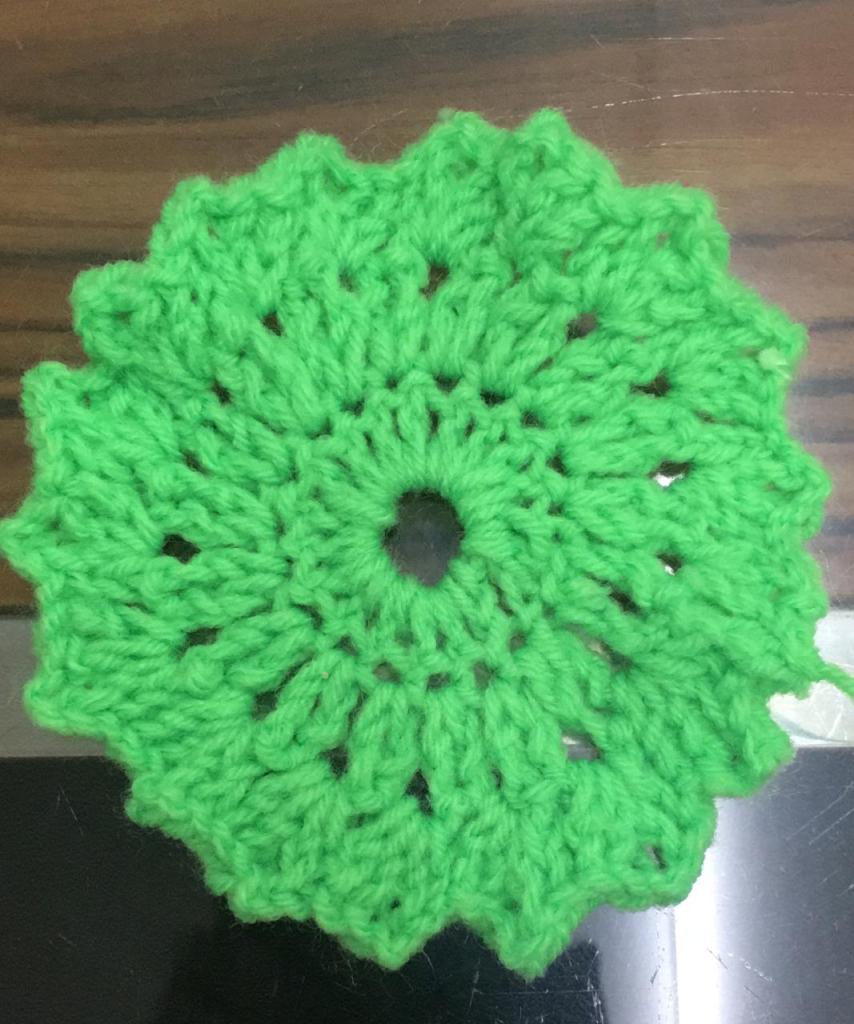
This is a tea coaster I’ve recently learnt how to crochet from the YouTube channel- Bella Coco The best part of this is that it is quick and easy to make and looks pretty too. Link for the video is provided: https://youtu.be/Ium6UBEEpm0 .
-TANVI R.J
This is a painting I made using Camel and Pidilite acrylic paints. The idea was taken from Google but there are a few modifications in my version. It is a easy but a creative and fun painting for beginners!!!
-TANVI R. JOG
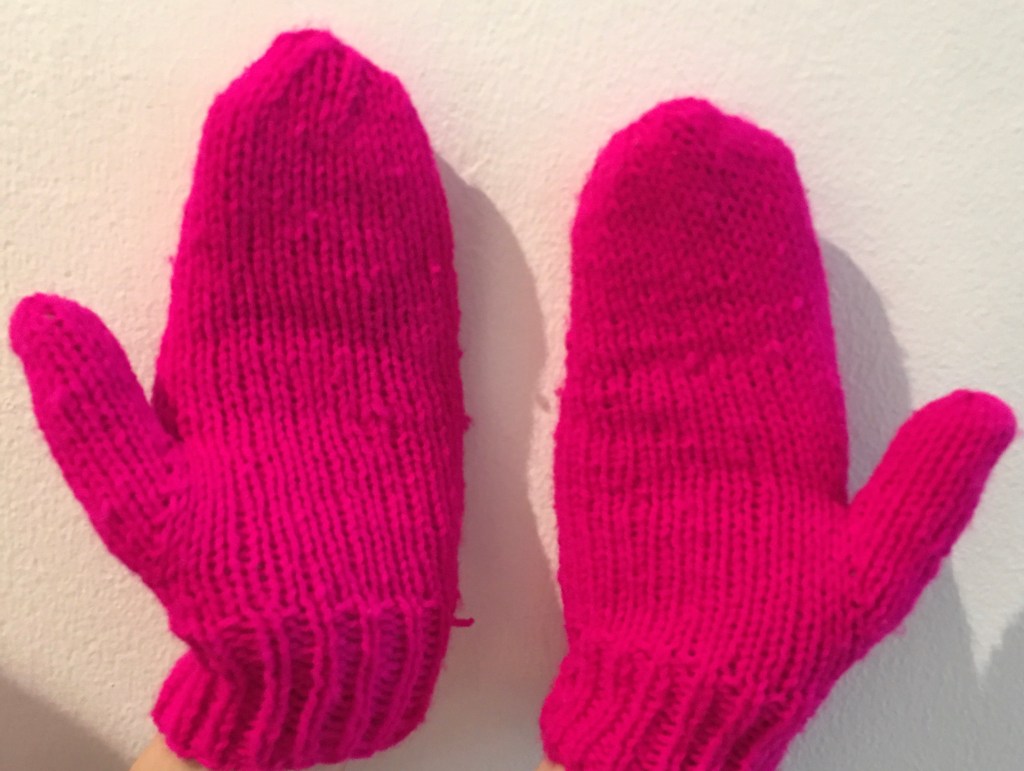
These are a pair of mittens knitted on straight needles and seamed on one side. The only material needed for these mittens is yarn (Blue Star Acrylic Cashmilon Yarn recommended), straight knitting needles/ smoothened BBQ sticks, tapestry/darning needle, place markers, stitch holder and scissors.
The steps for the following are mentioned in the description below the video.
These are easy to make if you have some experience knitting or even for beginners!!!
-TANVI R. JOG
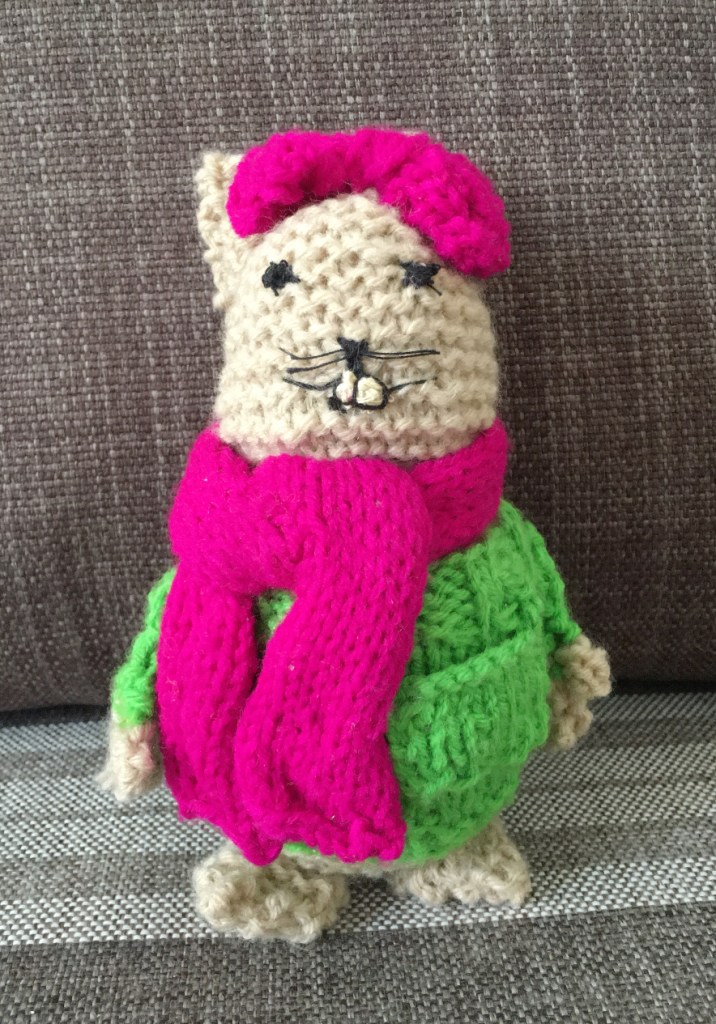
This is a cute rabbit that I have hand- knitted using Oswal Blue Star Acrylic Cashmilon Yarn, knitting needles/ I used BBQ sticks converted into knitting needles ( by adding smoothening them and adding a bid bead at the back end so that your stitches don’t come slip out), tapestry needle and a pair of scissors. I also took help from a YouTube channel and website : Studio Knit – https://www.studioknitsf.com/ . You can visit this website for any help with knitting and also learn knitting for beginners.
It is very easy to make, looks cute and you can gift it friends and family too!!!
-Tanvi R. Jog

This is a acrylic painting of trees along with beautiful and bright colours. The idea was taken from Google but I have tried to modify it. The best part of this composition is the combination of the colours and the trees!!!
-TANVI R. JOG
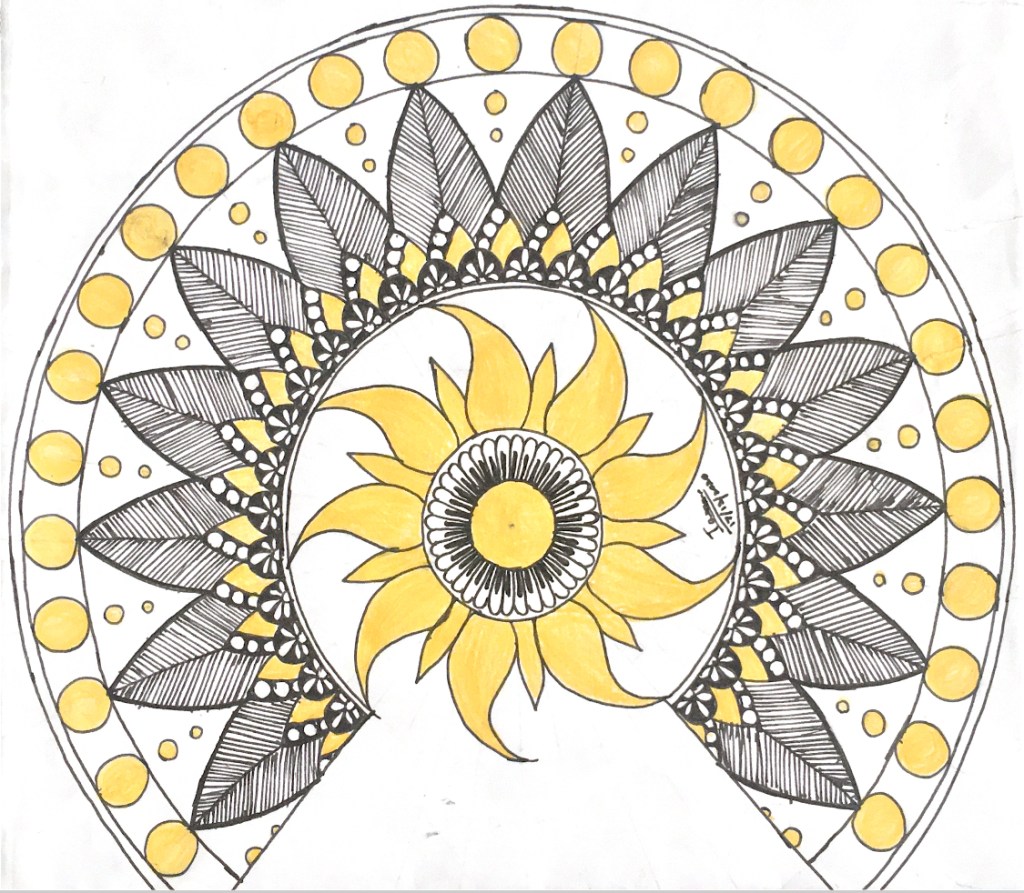
This is a mandala done by taking inspiration from the Sun. The idea was taken from Facebook. The best part about this mandala is the way the design goes along well with the yellows in this composition!!!
-TANVI R. JOG
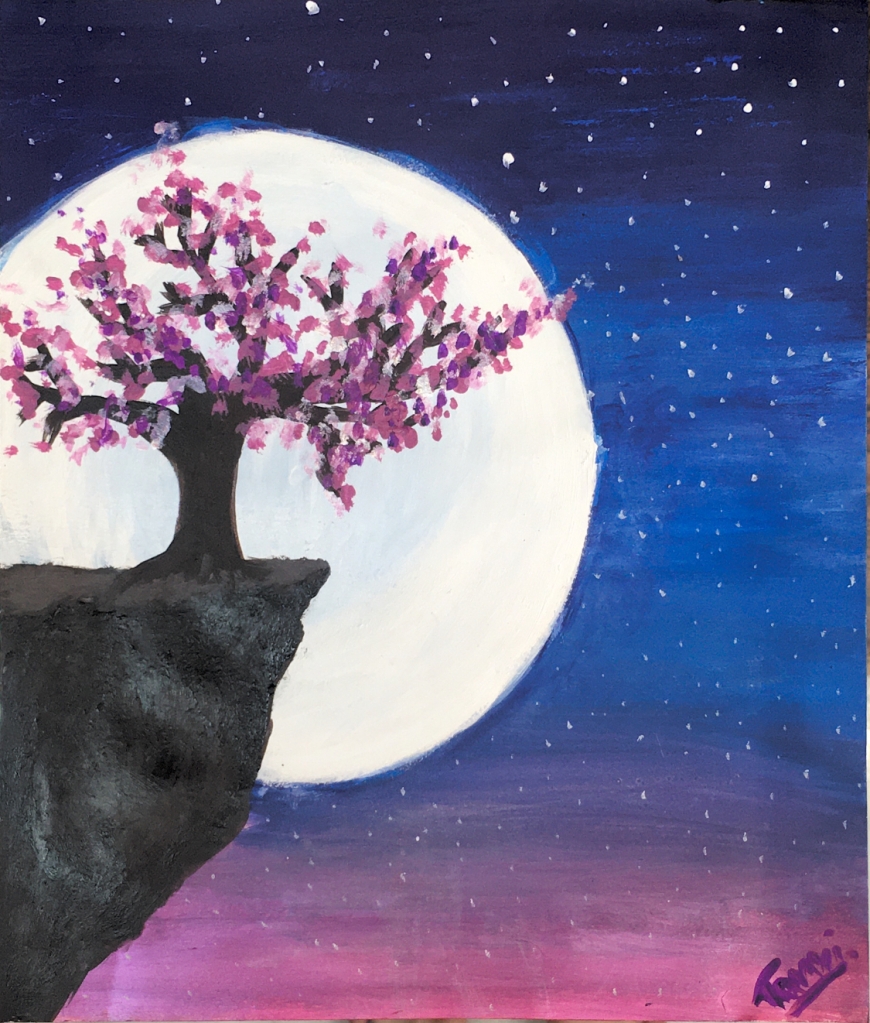
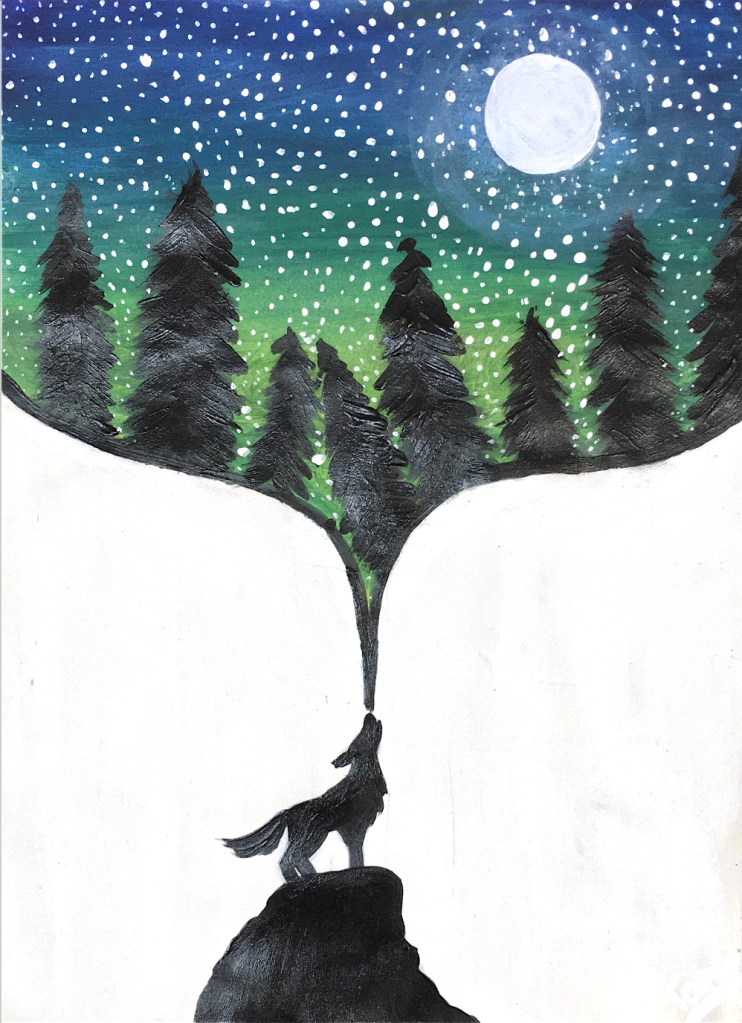
This is a painting of the Moon, a tree and the beautiful night. The idea was taken from Google but I have tried to modify it. The best part of this painting is the way it looks so serene and peaceful, bringing out the beauty of the night!!!
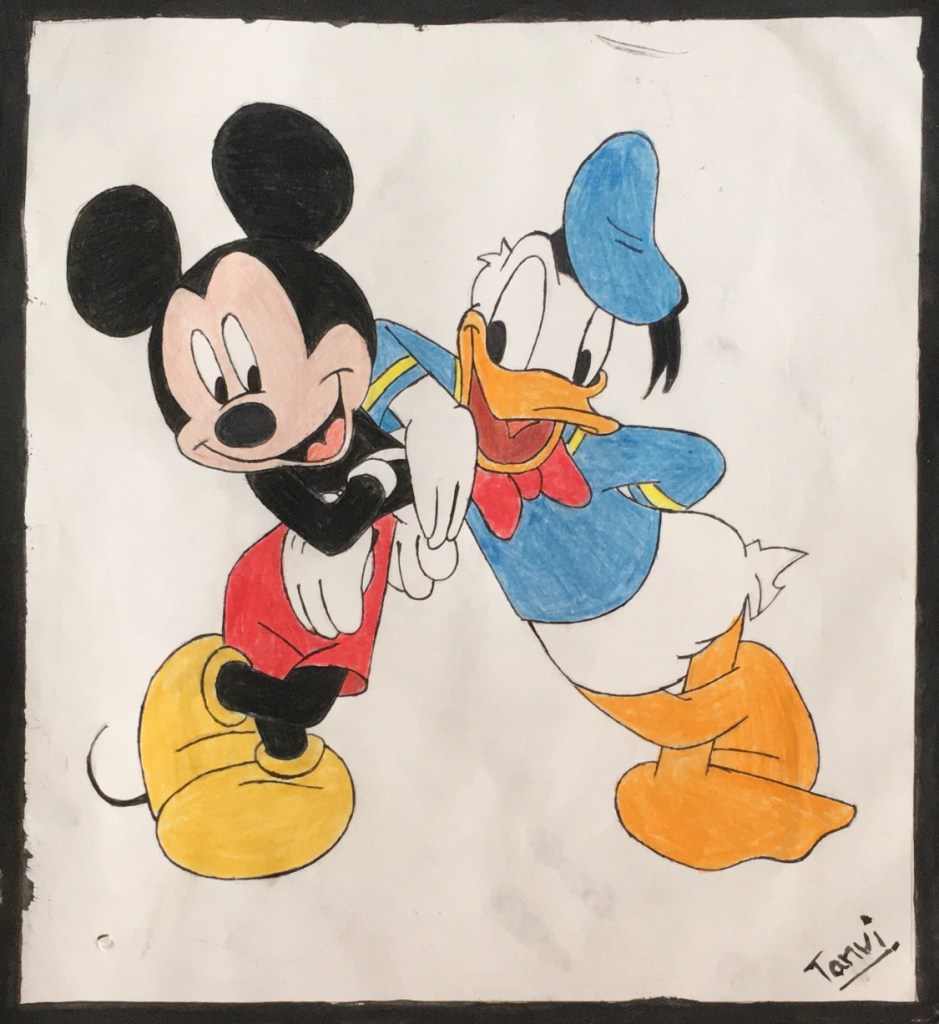
This is a drawing of the well-known pair of Mickey Mouse and Donald Duck from Disney Cartoons. The best part is that their expressions have come out exactly as shown in the cartoon!!!
-TANVI R.J
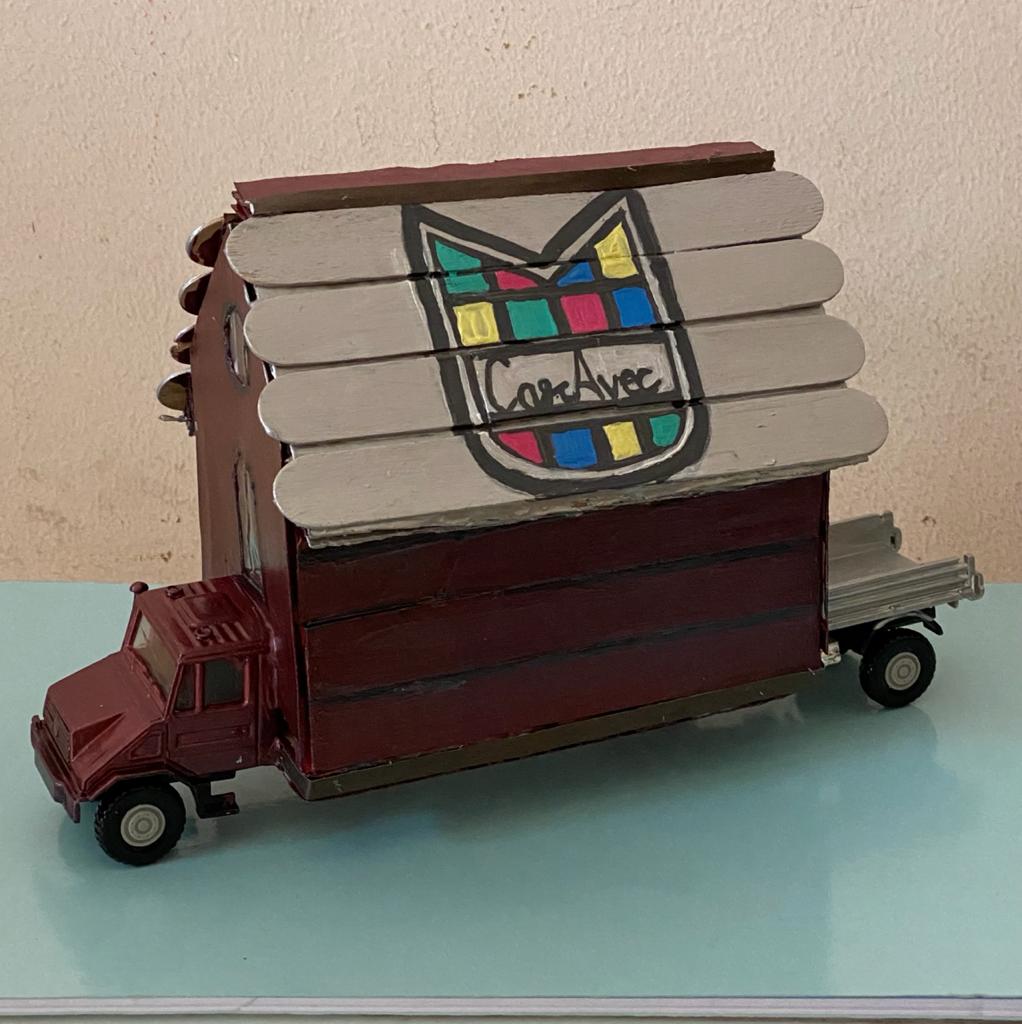

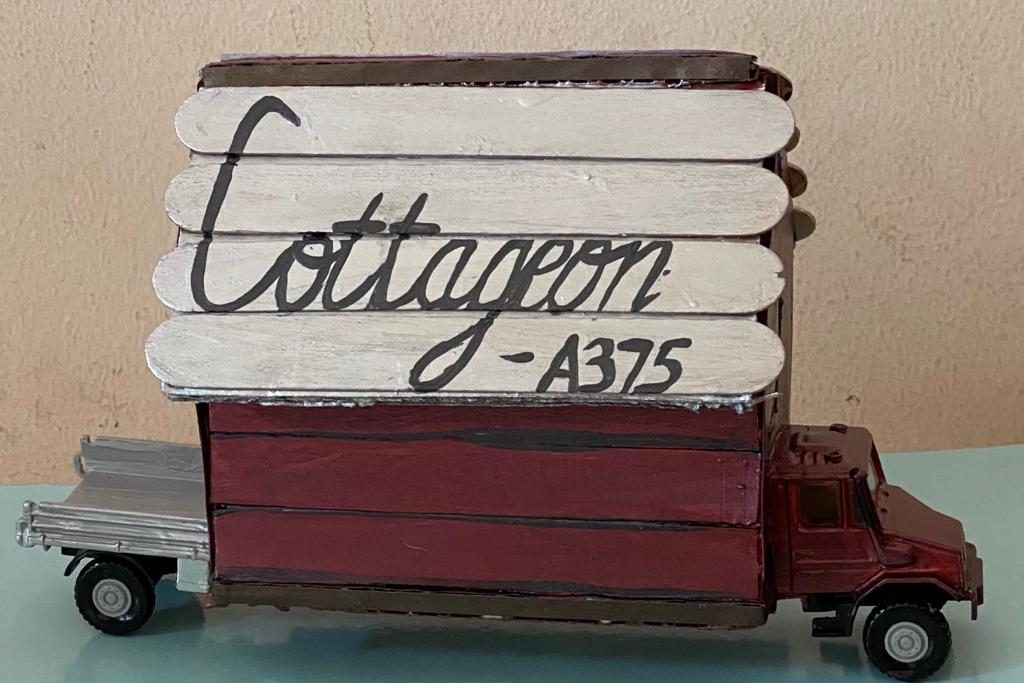
This is kind of a model of a car that I have designed taking inspiration from caravans and other various types of cars found nowadays. Materials used in making this are popsicle sticks, cardboard, a broken toy car/truck (or if you don’t have any way to get a broken toy car/truck you can make wheels using a paper stick/ any other stick and bottle caps AND then you can make the other parts of the cars using cardboard, glue and popsicle sticks), acrylic paint (preferably Pidilite), a cutting blade, transparent plastic sheet (optional- to make windows), Fevicol, some creative ideas and lots of patience!
Unlike I usually do with crafts, this time I’m not going to be giving steps to make this model because in this there is a lot of scope for creativity, you can make the model that you want, you can design it your own way (I will suggest you to first draw the idea in your head on a piece of paper and then start making it). Once you are done making your model, give it a nice colour (I have used metallic colours for my model). After the paint dries off, take a piece of paper and create a name for your car model as well as a company in case you want to make more creative cars and design a logo as well! I combined two words to make the name of the company ; car + avec. Avec= with in French, therefore the name becomes Caravec meaning car with. Then, I named the car Cottageon A375 after it’s design which looks like a cottage on top of pickup car and just added a few numbers and a letter for effect.
After the paint dries, your model is ready!!!
-TANVI R.J
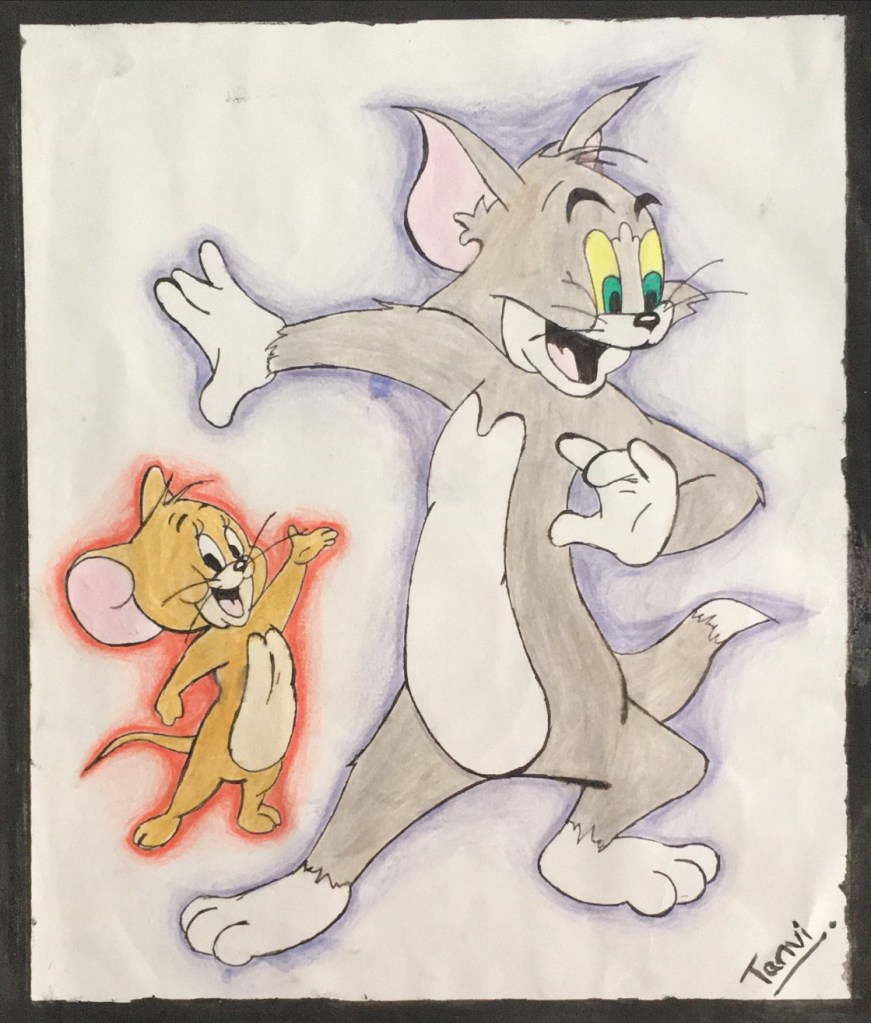
This a drawing of the epic cartoon characters- Tom & Jerry! It is one those those cartoons that is loved by both kids as well as adults and being a Tom & Jerry fan, I thought of drawing them !!!
-TANVI R.J
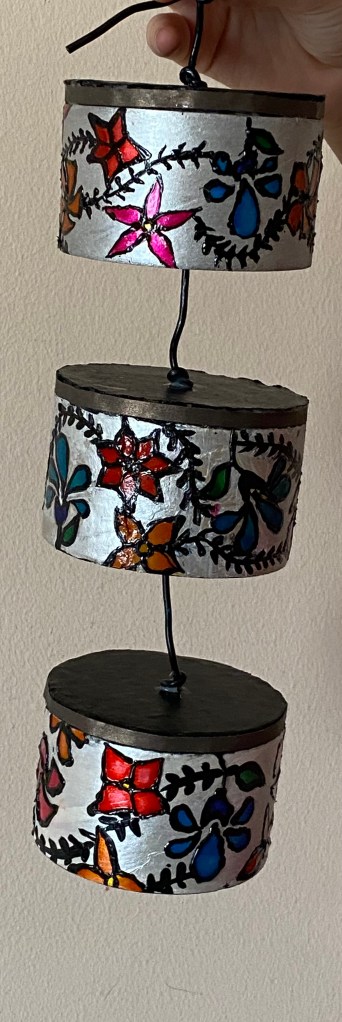
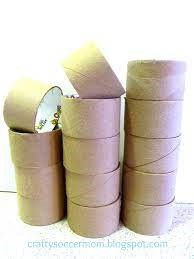
This is a DIY Home Décor Wall Hanging made with simple materials easily available at home- empty cardboard of masking/duct tapes (3), Fevicryl paints/ Glass paints, a wire/ string, Fevicol and cardboard.
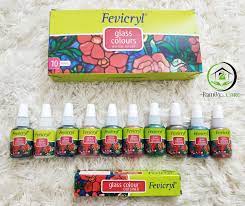
For more such crafts visit the ART page ( https://artistic.poetry.blog/art/)
-TANVI R.J
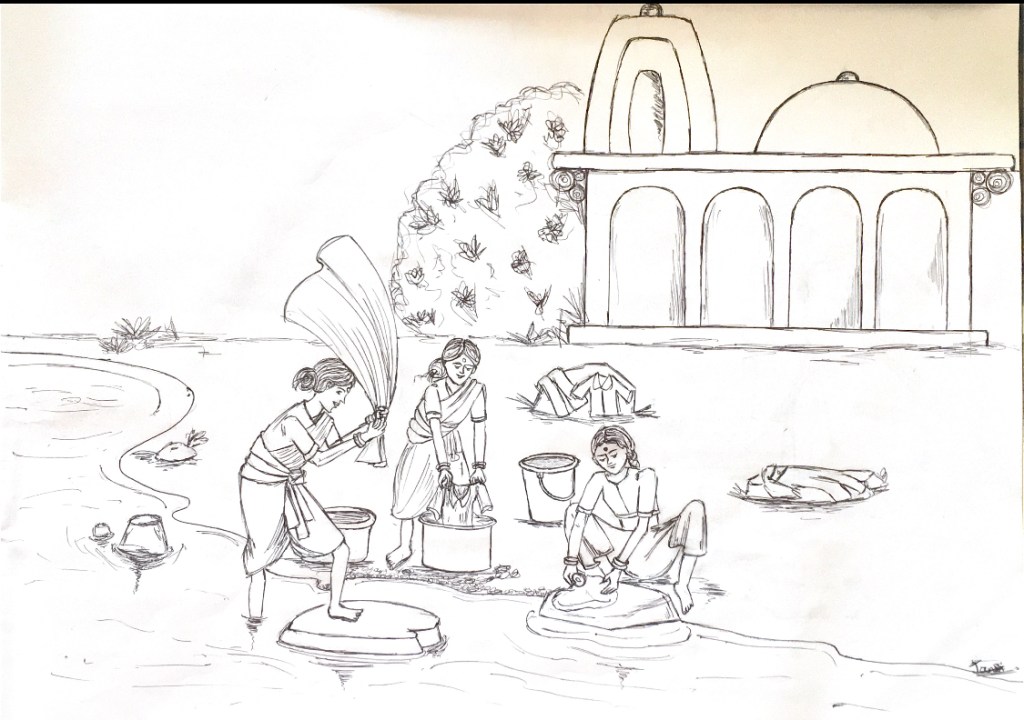
This is a simple sketch of a common scene seen in India at riverbanks; women washing clothes. I have taken the idea from the book : Grade Examinations – Drawing Made Easy by Navneet. Well, best part is the way the image has been adapted as a drawing!!!
-TANVI R.J
